Saturday, March 12, 2011

Papertrey Ink Design Challenge

Pin It

For this week's Make It Monday challenge,
our friends over at Papertrey Ink asked its followers
to create a card using at least one Papertrey Ink product
and to incorporate the paper distressing technique.

This little sweetie is my entry into the challenge.


A bird house was created using Papertrey Ink's
Love Grows Here stamp set.
The house and roof were inked on coasters and then cut out. 
A little rick-rack was added for a fun trim. 
The house was then raised on the card stock
using pop-up dots.  The little birds and branch are from Papertrey Ink's
Little Bitty Birds stamp set.  Each were die cut from felt.


I really love this sentiment (also from Love Grows Here stamp set).
Isn't it so true?!  I think love also grows best in small houses!


Aqua-colored card stock was used for the background.
I sanded and scissor-distressed the edges and lightly sanded the foreground.

I think this little sweetie is headed to Operation Write Home
so that someone serving in the armed forces can write
a loved one a treasured note.  I don't think I can ever make enough
cards to honor our brave military.


Wishing you a wonderful weekend!
Photobucket
SNEAK PEAK of posts coming this week:


Be sure to check back and see what's new at
Footprints from Otter Hill!

Thursday, March 10, 2011

Happy Bird-day

Pin It


This card was created with inspiration from two different design challenges -
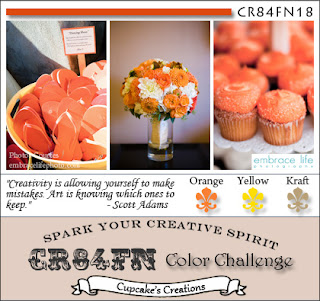
the CR84FN Color Challenge and Papertrey Paper Dolls Weekly Challenge.

Papertrey Paper Dolls challenged artists to create a card using at least three Papertrey Ink items -
one starting with a P, one with a T and one with an I (PTI).

CR84FN Color Challenge is to create a card using only three colors -
Orange, Yellow and Kraft Brown.
P:  Papertrey Ink's Polka Dot Parade Patterned Paper
T:  Papertrey Ink's Tiny Treats Stamp Set and Twill Ribbon in Summer Sunrise
I:  Papertrey Ink's Vintage Touch Ink

The little birds were die cut and glued to the medallion.
The balloon was colored using pencils and sparkly gel pens.
The center medallion and banner were layered and each raised using pop-up dots.


Supplies:  All from Papertrey Ink (except glue, tape, pencil & pen, orange chalk ink)

Paper: Kraft cardstock, Orange Zest cardstock, Polka Dot Parade Patterned Paper
Stamp Sets:  Tiny Treats Birthday , Little Bitty Bird
Die Cuts: Little Bitty Bird
Ribbon: Summer Sunrise Twill
Felt: Berry, Harvest Gold
Ink: Vintage Touch, Lemon Tart


This is my first entry into any design challenge.  What do you think?  

Photobucket

So Long Dear Friends

Pin It


The Lenten season is upon us.  This year I decided to give up CANDY for Lent.  This is a BIG sacrifice for me - especially chocolate.  Chocolate is a dear, dear friend.  Always comforting. 

I have two people in my life to thank for my sweet tooth.  First, my dad who says, 'There's always room for dessert!' - and my mother always served dessert with dinner - every night without fail!  Second, my Uncle Joe who lived with us for a time when I was a child.  Seemed like every day he brought home a bag a penny candy for me!


So long, Hershey kisses - you sweet little nibbles.


So long, See's chocolates and Chukar Cherries  


So long, candied apples (wait, do you count as candy?) ...


So long, coconutty - marshmallow gooey Mallo Cups


(Yes, I do have an open box of Mallo Cups in my pantry.)
 
So long, licorice - my strawberry friend


My scrumptious buttery delights.


So long dear friends ... I'll see you in 40 days!


Photobucket


Wednesday, March 9, 2011

Hello, Cupcake!

Pin It
This cupcake has been described as the best cupcake ever!


Better than any at Cupcake Royale.

Better than any at Trophy Cupcake.

Better than any made from a box mix - oh, please, don't go there.

A plate of cupcakes for my mom & dad. 
A box of cupcakes for two very sweet tweens.
Cupcakes qualify as breakfast food, don't you think?

This is one of the fabulous recipes in

Every cupcake that I have made from this collection has been FABULOUS!


Martha Stewart's Devil's Food Cupcakes

3/4 cup unsweetened Dutch-process cocoa powder
3/4 cup hot water
3 cups all-purpose flour
1 teaspoon baking soda
1 teaspoon baking powder
1 1/4 teaspoons coarse salt
1 1/2 cups (3 sticks) unsalted butter
2 1/4 cups sugar
4 large eggs, room temperature
1 tablespoon plus 1 teaspoon pure vanilla extract
1 cup sour cream, room temperature


Preheat oven to 350 degrees. Line standard muffin tins with paper liners. Whisk together cocoa and hot water until smooth. In another bowl, whisk together flour, baking soda, baking powder, and salt.

Melt butter with sugar in a saucepan over medium-low heat, stirring to combine. Remove from heat, and pour into a mixing bowl. With an electric mixer on medium-low speed, beat until mixture is cooled, 4 to 5 minutes. Add eggs, one at a time, beating until each is incorporated, scraping down sides of bowl as needed. Add vanilla, then cocoa mixture, and beat until combined. Reduce speed to low. Add flour mixture in two batches, alternating with the sour cream, and beating until just combined after each.

Divide batter evenly among lined cups, filling each three- quarters full. Bake, rotating tins halfway through, until a cake tester inserted in centers comes out clean, about 20 minutes. Transfer tins to wire racks to cool 15 minutes; turn out cupcakes onto racks and let cool completely. Cupcakes can be stored overnight at room temperature, or frozen up to 2 months, in airtight containers.

To finish, use a small offset spatula to spread cupcakes with frosting. Refrigerate up to 3 days in airtight containers; bring to room temperature and garnish with chocolate curls just before serving.


Basic Buttercream Frosting
Makes 6 cups (enough to frost one 8-inch layer cake or 32 cupcakes)


6 sticks unsalted butter, softened
9 cups confectioners' sugar
1 1/2 teaspoons pure vanilla extract

Beat butter and 3 cups sugar with a mixer on medium speed until combined. Reduce speed to medium-low, and continue to beat, gradually adding remaining 6 cups sugar, 1 cup at a time. Raise speed to medium-high; add vanilla. Beat until pale and fluffy, about 3 minutes more.


Have you had a cupcake today?

Photobucket

Sunday, March 6, 2011

Papertrey Ink Fun

Pin It
I received a box of fun from Papertrey Ink this week and
had a ball in my studio
making some cards for the Papertrey Ink Make It Monday Challenge.

 
Enjoy the preview!


Stamps:  Papertrey Ink Flower Fusion #1
Flowers die cut using fun foam, hand colored with a pink marker
and then finished with vintage buttons.

This little treasure is destined for my new Send Love Today assignment in Ohio.


Stamp Set:   Papertrey Ink Tag-Its #1

Stamp Set: Papertrey Ink Button Boutique and
Papertrey Ink Signature Series Dress Form
"Buttons" were die cut using fun foam and then hand colored
with a green marker and attached to the die cut card.

3/7/11 Update:  This beauty is entered into the Get Sketchy #77 Weekly Challenge.
 I made two of these cards.  One is available in my etsy shop and
the other is destined for a very special person
treasured in my life
(Shhhhhh ...  it's a surprise)!

Stamp Set: Papertrey Ink Tag-Its #1
This lovely lady is headed for one of our grand-daughters soon!


Hope you had a fun-filled weekend!
Photobucket

3/7/11 Update:  Linking up to  monogram and Photobucket.


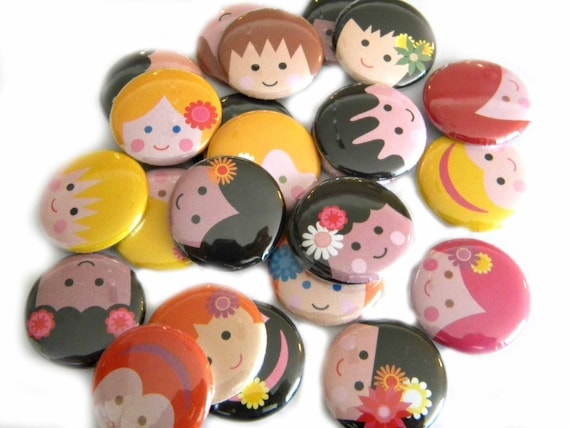
3/7/11 Update:  A Giveaway Contest to put a smile on your face at Tattertots and Jello25 Happy Face Children Flat Back Buttons

Wednesday, March 2, 2011

Color Me Tickled Pink

Pin It Today I received a box of INSPRIRATION - two books that I just had to have for my studio.  After renewing each book three times, returning them to the library, re-ordering and then renewing each again three times, I figured it was time to acquire these little treasures.

Fleecie Dolls by Fiona Goble
and
Color Sense by Susan Levin
 Color Sense - Creative Color Combinations for Crafters provides a kaleidoscope of color combinations on 200 pages of high-glossy paper.  Susan Levin introduces the reader to color theory, the language of color and color considerations.  The book showcases monochromatic, two, three and four color combinations for the entire color spectrum.  The book also comes with color swatches (like paint-chip samples) and a color wheel for your crafting bag.  I'm hoping this book will push me out of my comfort zone into new and exciting worlds of color. 

Here are a few examples of color palettes I pulled together with just some things laying around my office.  

Photo Left:  Three color split complement - yellow, blue/violet and orange

"Split complements are composed of a color plus the two colors on either side of the complement.  These combinations have strong visual contrast, like complements, but they have a lower level of tension because the colors are not in direct opposition."


Photo Right:  Three color triad - yellow/green, red/orange and blue/violet

"Triads include three colors that are equally spaced around the color wheel.  Triads create balanced color combinations with strong contrast but without the visual intensity of complementary colors."

 I really need this book.
I would have never thrown orange into the mix.


Three color analogous combination - blue/violet, violet and red/violet

"Analogous combinations are made up of three or more colors that are adjacent to each other on the color wheel.  Analogous combinations are related to monochromatic combinations but often look richer and more nuanced."


 Fleecie Dolls provides detailed instructions for making fifteen dolls - all made with fleece.  Cutting templates are included.  There are patterns for several baby dolls suitable for a large age range, plus patterns for a pirate, an alien and a monster for little boys.

 This little doll, Florence, reminds me of our little 3-year old grand-daughter Eloise.  She is the primary reason for purchasing this book.  I can't wait to stitch up this little treasure for our baby doll!!

I think Maggie would love to sink her teeth into this monster -
especially if it squeaks!


Join me over the next several weeks as I begin to expand my world of color.  I hope you'll share your color explorations too!

Photobucket
"'I set My RAINBOW in the cloud, and it shall be for the sign of the covenant between Me and the earth. It shall be, when I bring a cloud over the earth, that the RAINBOW shall be seen in the cloud; and I will remember My covenant which is between Me and you and every living creature of all flesh; the waters shall never again become a flood to destroy all flesh. The RAINBOW shall be in the cloud, and I will look on it to remember the everlasting covenant between God and every living creature of all flesh that is on the earth.” (Genesis 9:12-16)


Monday, February 28, 2011

Cheap Eats: Beans and Rivals

Pin It It's been cold lately in the Pacific Northwest - even out here on the Island.  A good day for some warm comfort food.  My mother grew up in Pennsylvania.  So even though her mother was Italian and generally cooked with an Italian bent, she also learned some good 'ole Pennsylvania Dutch fare as well.  I remember as a little girl filling my belly with beans and rivals.  Of course, there were never enough rivals!


Start off with a meaty ham bone. I freeze the ham bone left over from a baked ham for just this use.  If you don't have a ham bone, you can use 2-3 ham hocks available in the meat department at your favorite grocery store.  Shouldn't cost you more than about $1.50/ham hock.  Boil the ham bone in a 6-qt dutch oven filled with water, then simmer for at least an hour. The meat will fall off the bone. Remove the bone(s) and break apart the meat.

You will need about 2 cups of cooked white beans.  I use either cannellini beans or northern beans.  If you use canned beans, rinse and drain ahead of time.  Add the beans to the ham broth.  You can also add a small onion (chopped) and/or 1-2 cups of cubed potatoes if you have them on hand.  Raise the heat to bring the broth to a low rolling boil again. 


To make the rivals, mix two cups of flour, about 1 tsp of salt and pepper with some water
(about 1/2 cup should do). 
Mix using a fork to make crumbly dough. 
 
Drop bits of dough in hot broth. 
The rivals will sink to the bottom and then float to the top when cooked.
Add salt and pepper to the broth to your liking. 
Serve when cooked or simmer on low until ready to serve.

Great served with a crusty country bread to "slop up the juice" as my dad would say.


Don't mind the nippy cold weather when I can warm my belly and my heart with great comfort food and the memories of mother's kitchen.

Photobucket
3/7/11 Update: Link ups:

 
Related Posts Plugin for WordPress, Blogger...